First Steps
Last updated:
This guide covers the essential first steps to take within the Tyk AI Studio UI after successfully deploying the platform and registering your first user.
1. First Login
After completing the installation process and registering your first user:
-
Access the UI: Open your web browser and navigate to your configured
SITE_URL -
Admin Login: Log in using the administrator account you created during registration:
- Email: The email address you used during registration (should match your
ADMIN_EMAILenvironment variable) - Password: The password you set during the registration process

- Email: The email address you used during registration (should match your
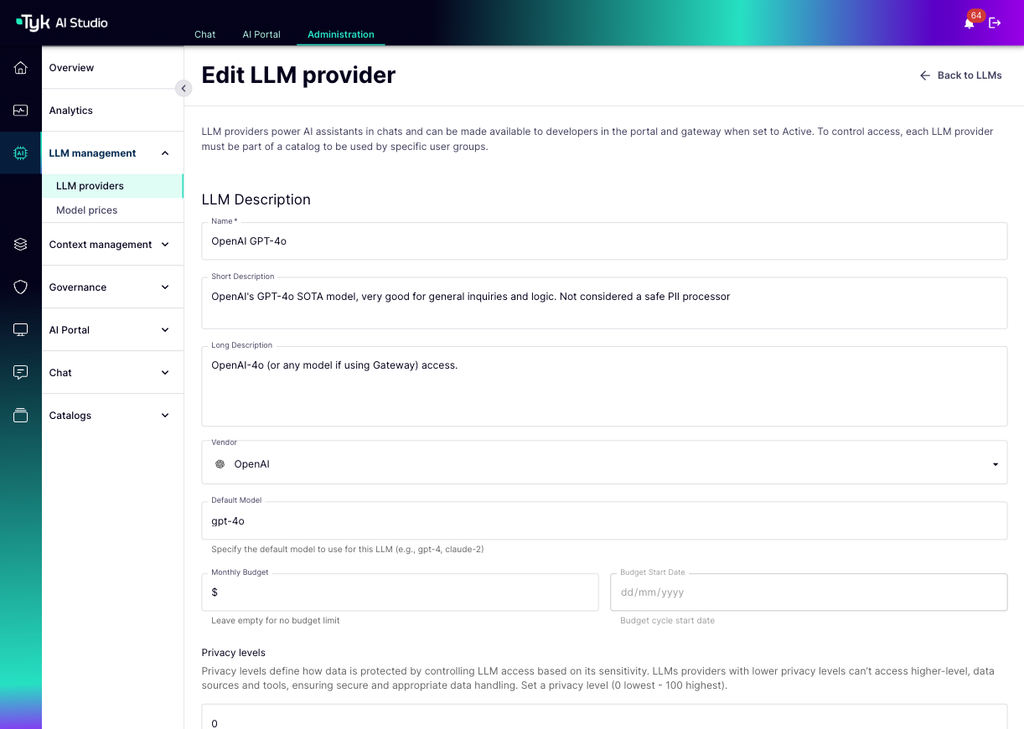
2. Configure Your First LLM
One of the most common initial steps is connecting Tyk AI Studio to an LLM provider.
-
Navigate to LLM Management: In the admin UI sidebar, find the section for LLM Management (or similar) and select it.
-
Add LLM Configuration: Click the button to add a new LLM Configuration.
-
Select Provider: Choose the LLM provider you want to connect (e.g., OpenAI, Anthropic, Azure OpenAI).
-
Enter Details:
- Configuration Name: Give it a recognizable name (e.g.,
OpenAI-GPT-4o). - Model Name(s): Specify the exact model identifier(s) provided by the vendor (e.g.,
gpt-4o,gpt-4-turbo). - API Key (Using Secrets):
- IMPORTANT: Do not paste your API key directly here. Instead, use Secrets Management.
- If you haven’t already, go to the Secrets section in the admin UI and create a new secret:
- Variable Name:
OPENAI_API_KEY(or similar) - Secret Value: Paste your actual OpenAI API key here.
- Save the secret.
- Variable Name:
- Return to the LLM Configuration screen.
- In the API Key field, enter the secret reference:
$SECRET/OPENAI_API_KEY(using the exact Variable Name you created).
- Other Parameters: Configure any other provider-specific settings (e.g., Base URL for Azure/custom endpoints, default temperature, etc.).
- Configuration Name: Give it a recognizable name (e.g.,
-
Save: Save the LLM configuration.
This LLM is now available for use within Tyk AI Studio, subject to User/Group permissions.
For more details, see the LLM Management documentation.
3. Verify Core System Settings
While most core settings are configured during deployment, you can usually review them within the administration UI:
- Site URL: Check that the base URL for accessing the portal is correct.
- Email Configuration: If using features like user invites or notifications, ensure SMTP settings are correctly configured and test email delivery if possible (Notifications).
4. Configuration Reference (Deployment)
Remember that fundamental system parameters are typically set via environment variables or Helm values during deployment. This includes:
- Database Connection (
DATABASE_TYPE,DATABASE_URL) - License Key (
TYK_AI_LICENSE) - Secrets Encryption Key (
TYK_AI_SECRET_KEY) - Base URL (
SITE_URL) - Email Server Settings (
SMTP_*,FROM_EMAIL,ADMIN_EMAIL) - Registration Settings (
ALLOW_REGISTRATIONS,FILTER_SIGNUP_DOMAINS)
Refer to the Configuration Options detailed within the Installation Guide for specifics on setting these values during the deployment process.
Next Steps
With the initial configuration complete, you can now:
- Explore User Management to create users and groups.
- Set up Tools for external API integration.
- Configure Data Sources for RAG.
- Define Filters for custom request/response logic.
- Try out the Chat Interface.